Alright, take two. Welcome back to the second edition of our last blog, which introduced Apple ProRes Log on the iPhone 15. In the first blog, we went over the format and its benefits and basics. We highly suggest you read this blog first before moving on.
We ended on a reality check in the first blog: the log files are massive. We are talking around 6 GB per minute. That is quite chunky for the everyday iPhone user. This requires either carrying around an attached hard drive to your iPhone or investing in substantial storage capacity. If neither sounds ideal, it’s best to avoid shooting in Log through the stock Camera app.
In this follow-up, we will go over how to use the Blackmagic Cam app with the codec. The app allows you to shoot in Apple ProRes Log with a much smaller file size, while maintaining the codec’s dynamic range and quality. Secondly, we will briefly go over how to process that footage on your phone and Adobe Premiere Pro.
Let’s loop back to our old friend from the first go-around, vlogger and filmmaker Matt Johnson. Johnson succinctly goes over how to use the Black Magic Cam app with the Log format on the iPhone 15 in this video. Feel free to ignore me completely and just watch the video, for all you visual learners. I won’t be sad, or will I? You will never know.
Get the app Blackmagic Cam
If you’re still with me, let’s go through the steps after you download the app. Got it? The app looks like this: 
Now, open the app and go to “Settings,” then select the “Record” tab. Switch the codec to HEVC H.265. According to Johnson, this codec is only 5% of the file size from the native camera app, which is a 4:2:2 format.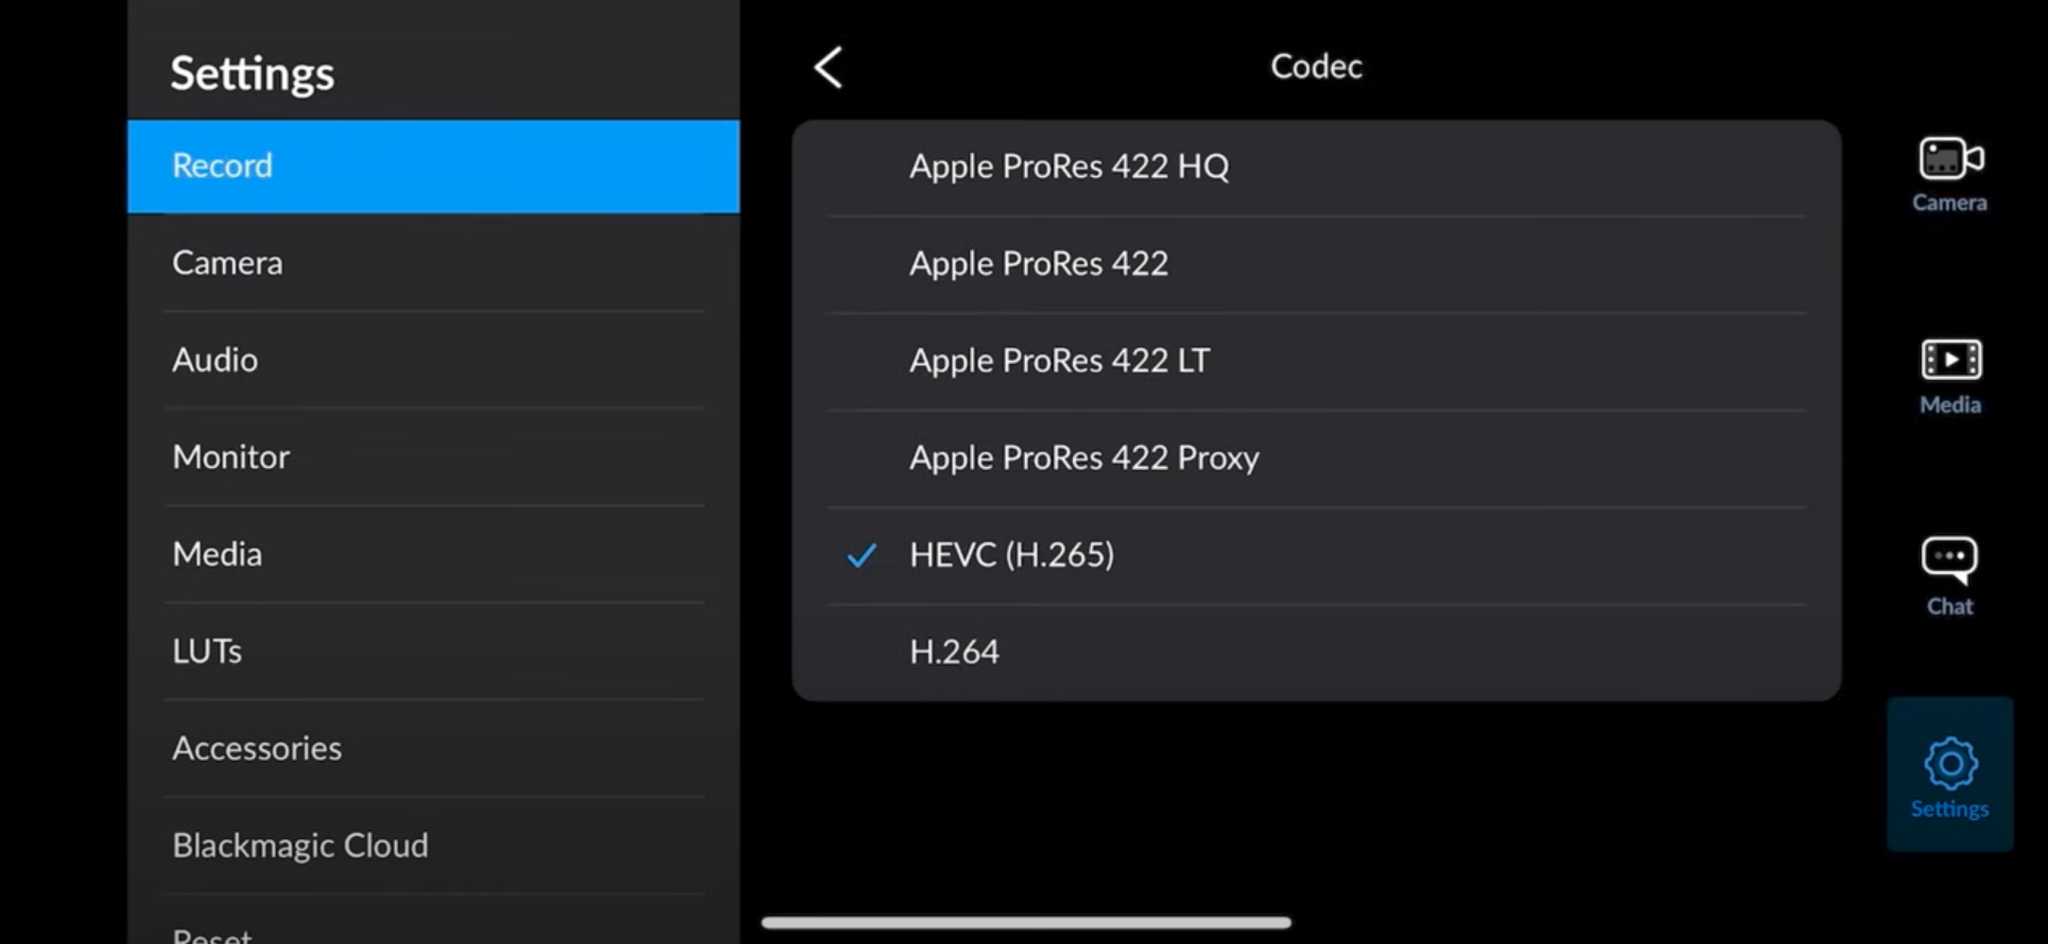
That number has to do with chroma subsampling. If I were to explain that, everyone would bail on this blog. Here’s a great breakdown from vlogger @girishkario, if you are curious.
Once you choose H.265 as your codec, choose your “Resolution” settings. I typically film in 4K at 24 fps. Now, most importantly, under “Color Space,” choose “Apple Log – HDR.” Unless you have any other specific needs, you’re ready to hit the camera icon to open up the camera and record through the app. 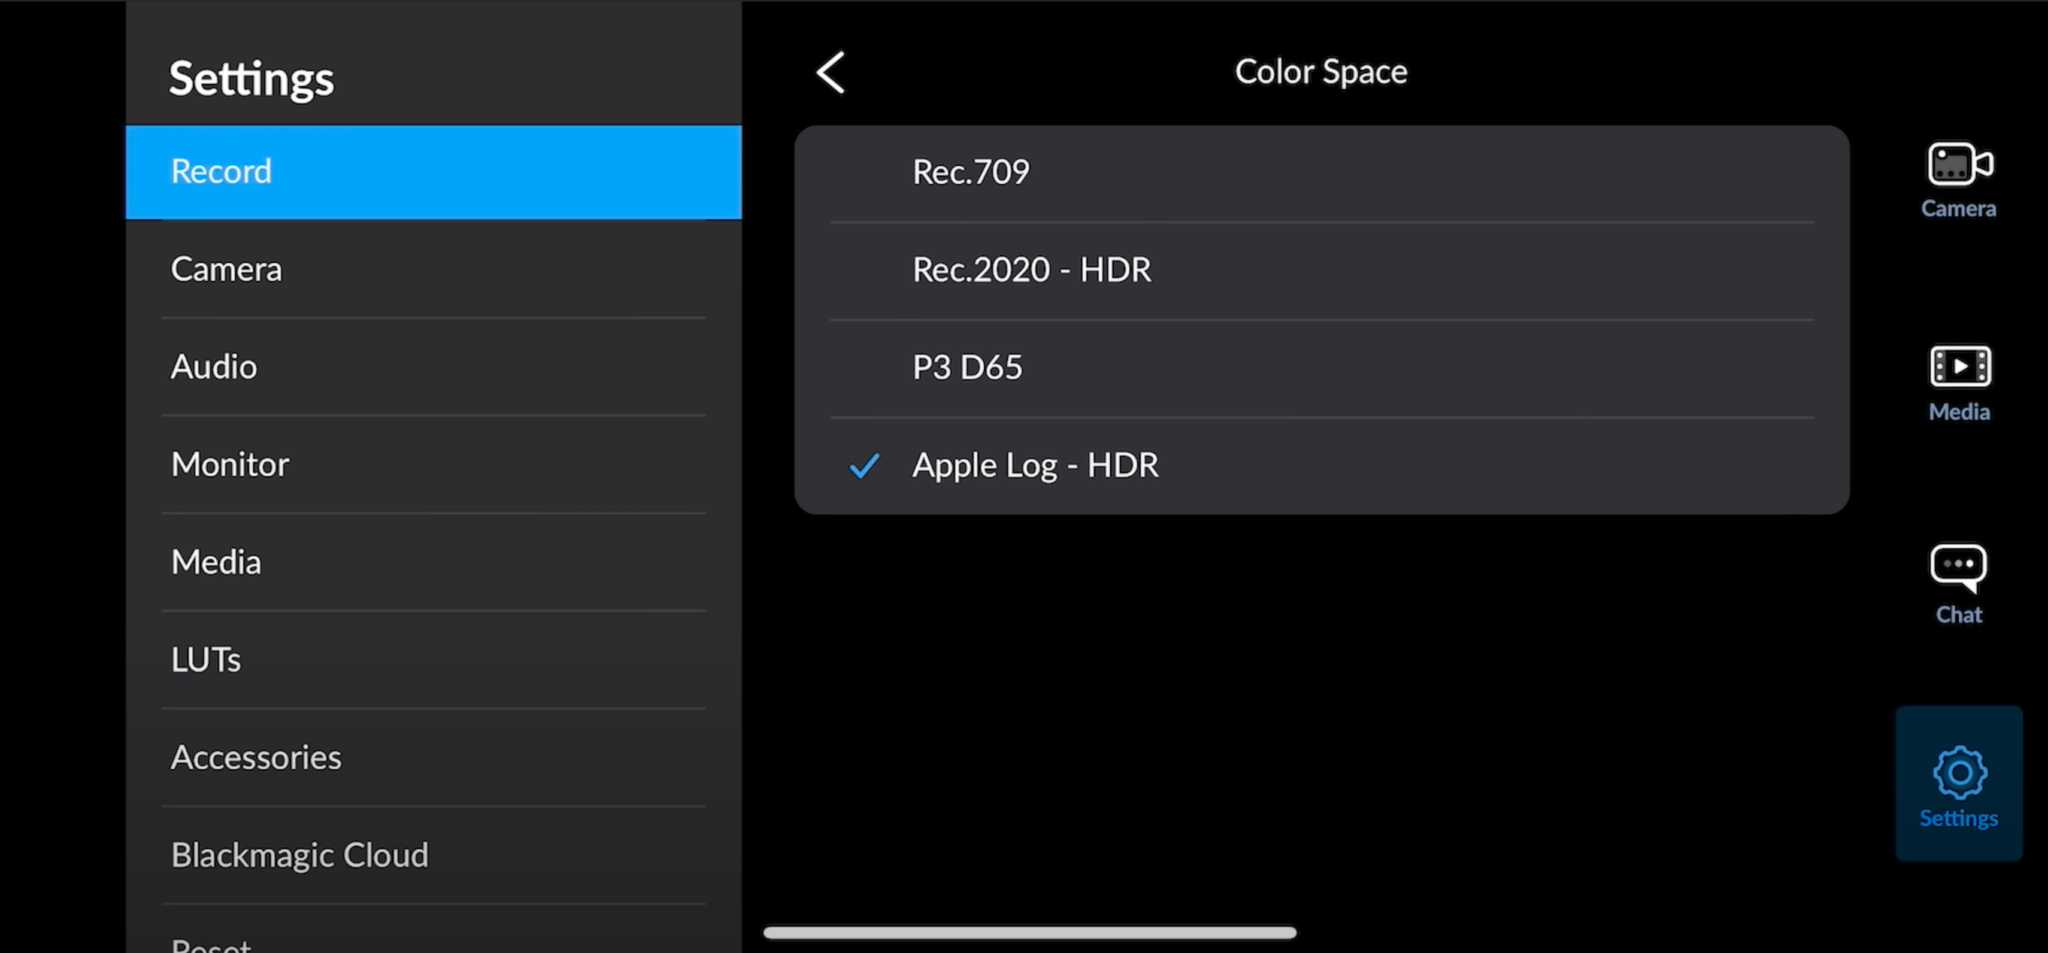
Settings to start filming
Now, set your White Balance at the top of the screen. Locate the “WB” icon. You can choose one of the default settings, manually input the WB Kelvin temperature, or tap on “Auto” while the WB icon is highlighted. 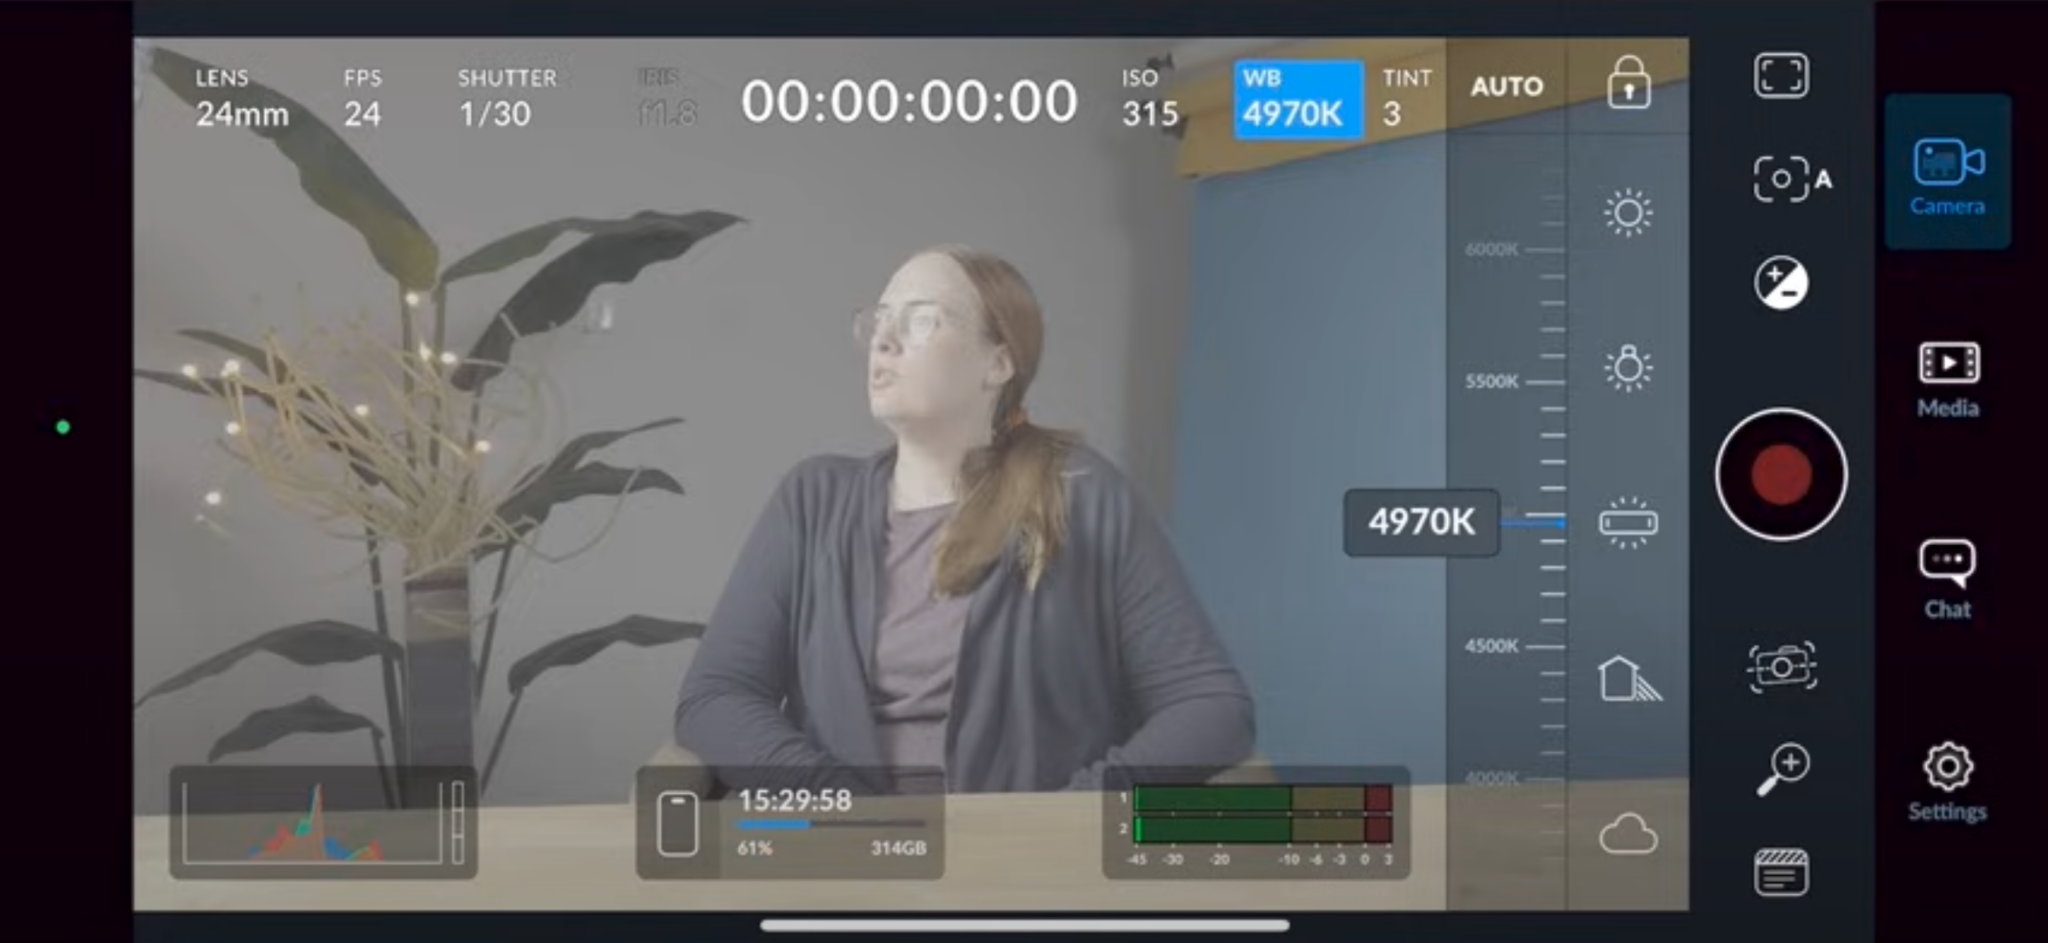
Next, let’s set exposure, one of the most crucial components to get right while shooting in Log on both phones, DSLR’s, and cinema cameras. Head over to the frame icon to open up another menu and select the zebra icon. Zebras indicate areas of the image that are overexposed or crossing a certain threshold. There are various threshold levels to choose from. For Apple Log, drag the slider until zebras read 95%. Keep an eye on zebras or stripes in your shot, especially on your key subject. If you see them, you may need to reduce the brightness in your image.
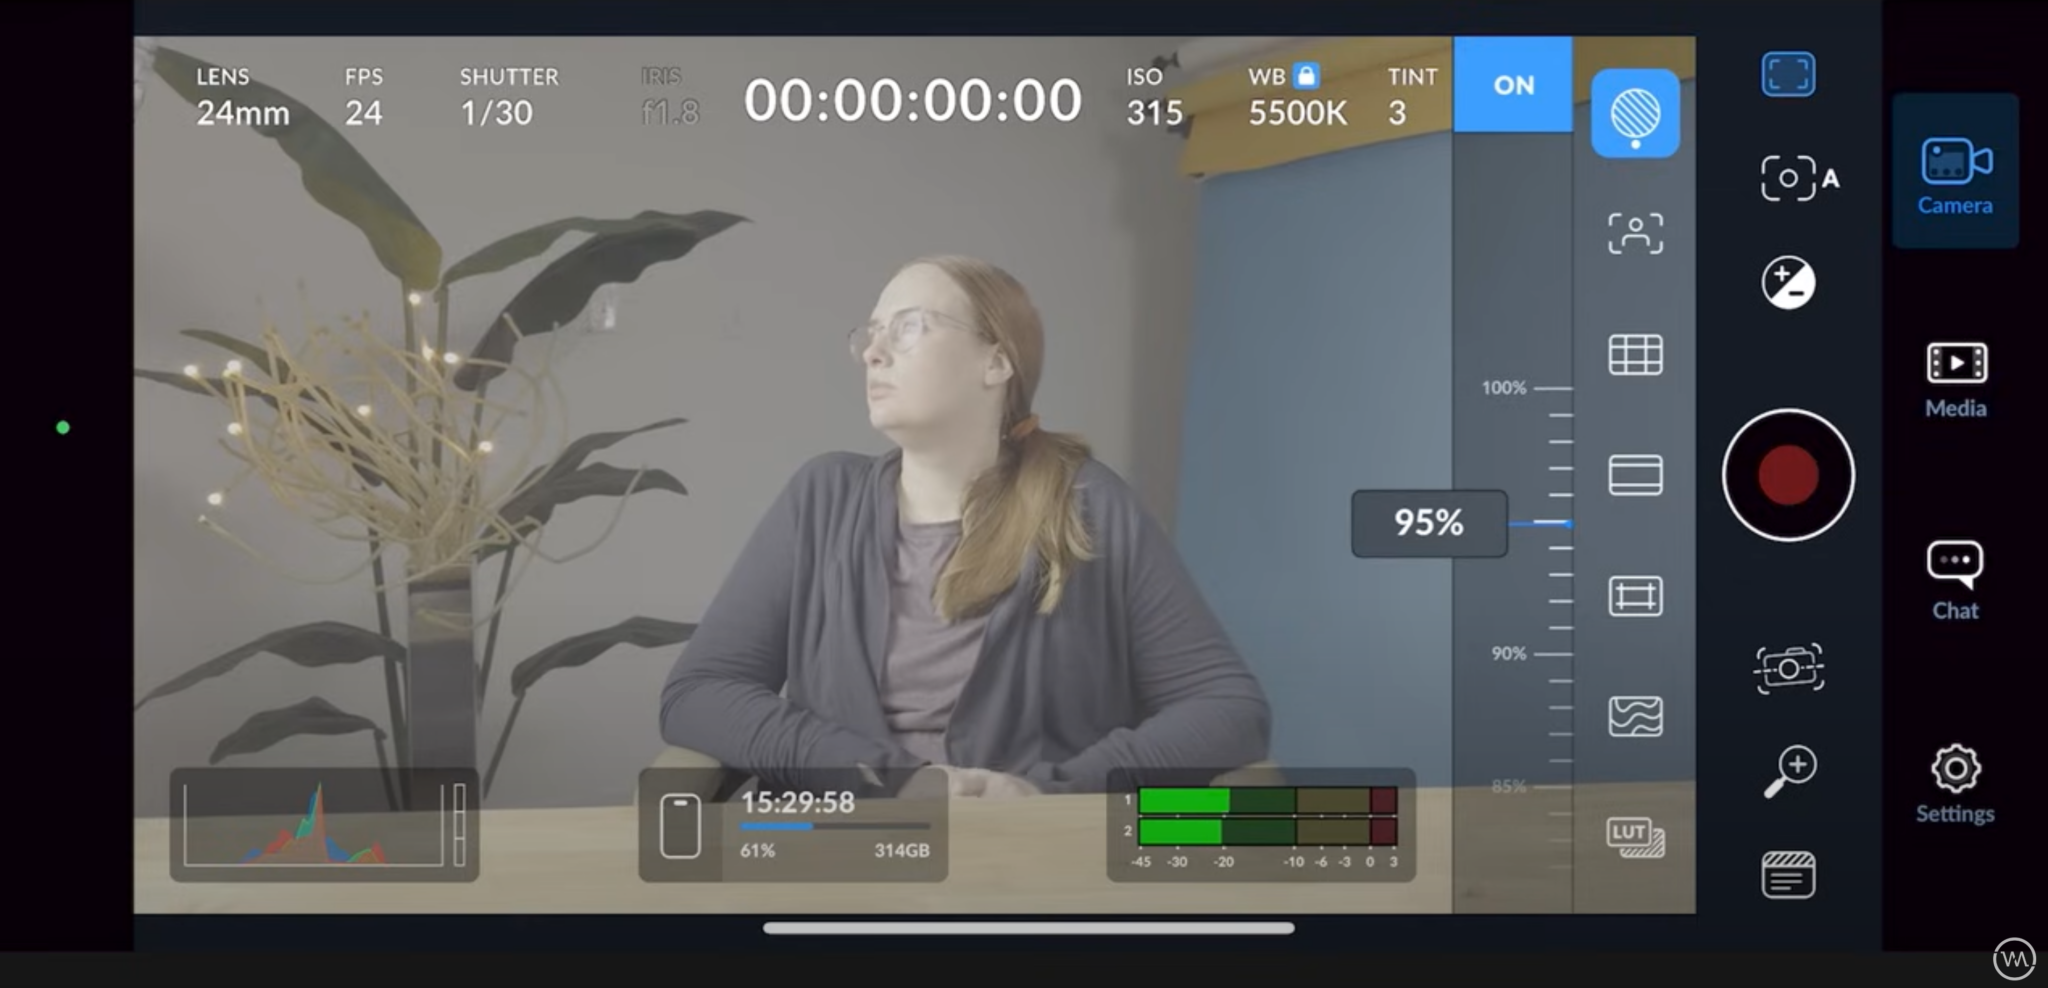
Exposing for Apple ProRes Log in Blackmagic Cam
Alright, this part gets a little tricky. Every camera has a different range or levels of ISO’s that are sweet spots for retaining full dynamic range. Dynamic range is the effectiveness of your camera sensor’s ability to avoid blowing out the brightest parts of the image and crushing the black parts. The idea is to maintain as much detail as possible in the highlights and shadows. This can vary from camera to camera and the type of sensor that determines how it captures and processes light.
There are those out there who do not experience brain melt or the pinnacle of impatience while testing out the sweet spots of various cameras. May they live long and prosper. For the iPhone’s Apple Pro Res Log, technical wizard and vlogger Gerald Undone finds that the ideal ISO for maximum dynamic range is around 1100 to 1450. So, we’ll go with that. *Shrugs with low confidence.*
Johnson suggests aiming in between that range at around 1250. This provides a maximum dynamic range of about 14 stops. This range is competitive with other cameras. Which is wild.
Unfortunately, you cannot lock your ISO and exposure without locking your shutter in the app. If you tap anywhere on your phone screen, it will readjust ISO as well as focus. To get around this, change your shutter speed and lock that in. Ideally, you want the bottom digit in your shutter to be double your frame rate. At 24 FPS, it would be at 1/48 or 1/50. Once your shutter is locked, tapping around your screen will automatically adjust focus only, not exposure. As a note, you cannot change your f-stop, as it is a fixed aperture at 1.8. 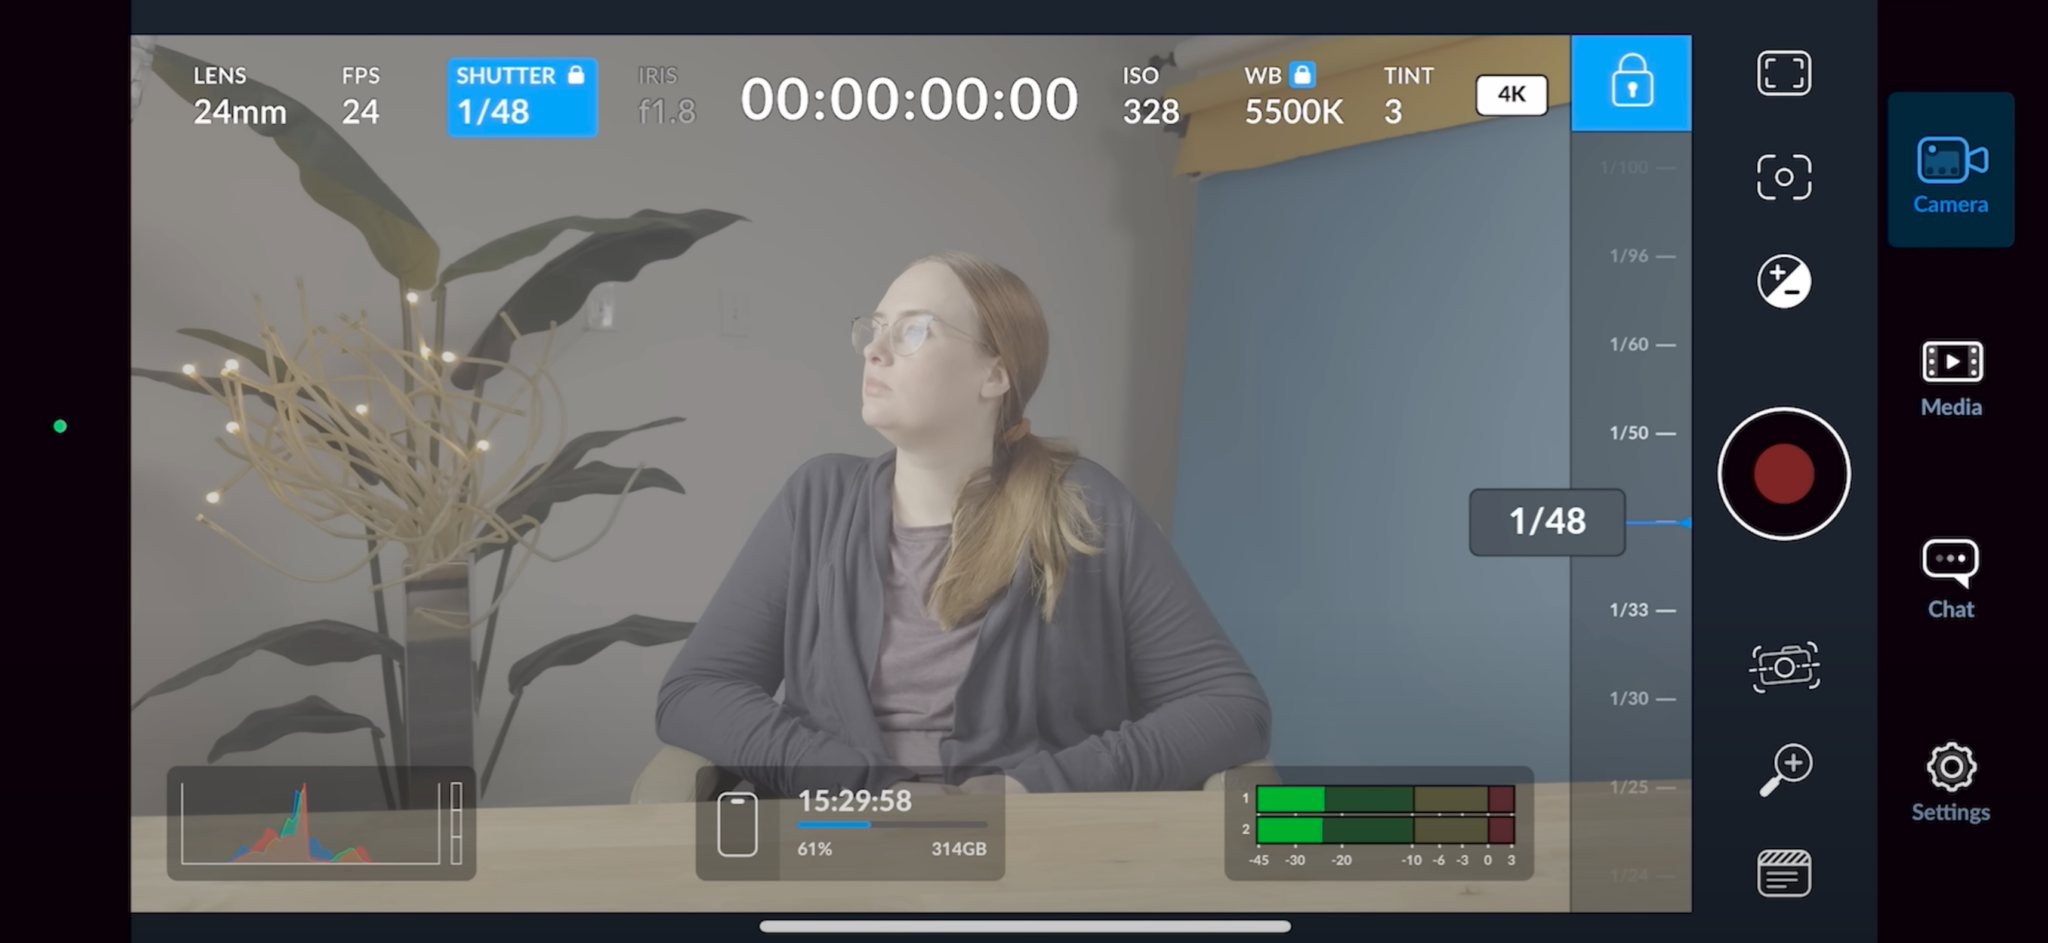
Now, if you want to shoot at a slower frame rate like 1/48 with an ISO of 1250, you will likely run into overexposure while filming outside on a bright day. If you want to maintain maximum dynamic range with the aforementioned settings, consider purchasing a neutral density filter for your phone. Think of ND filters as sunglasses for camera lenses. There are a variety of options out there, from cases that come with filters to individual attachments.
This is not required, as you can shoot in most settings in the app or straight out of your phone with automatic settings. Either way, you will still get quality video at a level unheard of until recently.
Lay on the LUTs
Whew, that was a lot. We’re on the last leg now: adding a Rec.709 LUT to your Log footage, color correcting, and then optionally grading it for publishing. As a reminder, Rec.709 is a color gamut standard for general viewing on common monitors and mobile devices. Essentially, applying a Rec.709 LUT restores your flat footage to “normal” contrast and colors for everyday screens.
YouTube vlogger and filmmaker Brandon Y Lee offers a link in this video description to download Apple’s Rec. 709 LUT. You can either import the LUT directly into the Blackmagic Camera App or into Premiere Pro. For the sake of time, here are the instructions outlined for the app by Lee. You can use this LUT or any other one that takes Apple ProRes Log to Rec. 709. Finally, to import a LUT into editing software like Premiere Pro, check out this video.
As a note, this is a “Technical” LUT, not a “Creative” one. Technical LUTs are designed for specific camera brands to convert one color space to another. Creative LUTs can be used on any footage that’s not always specific to a camera brand. These are for creating stylistic looks, rather than just converting flat S-Log footage to Rec 709. 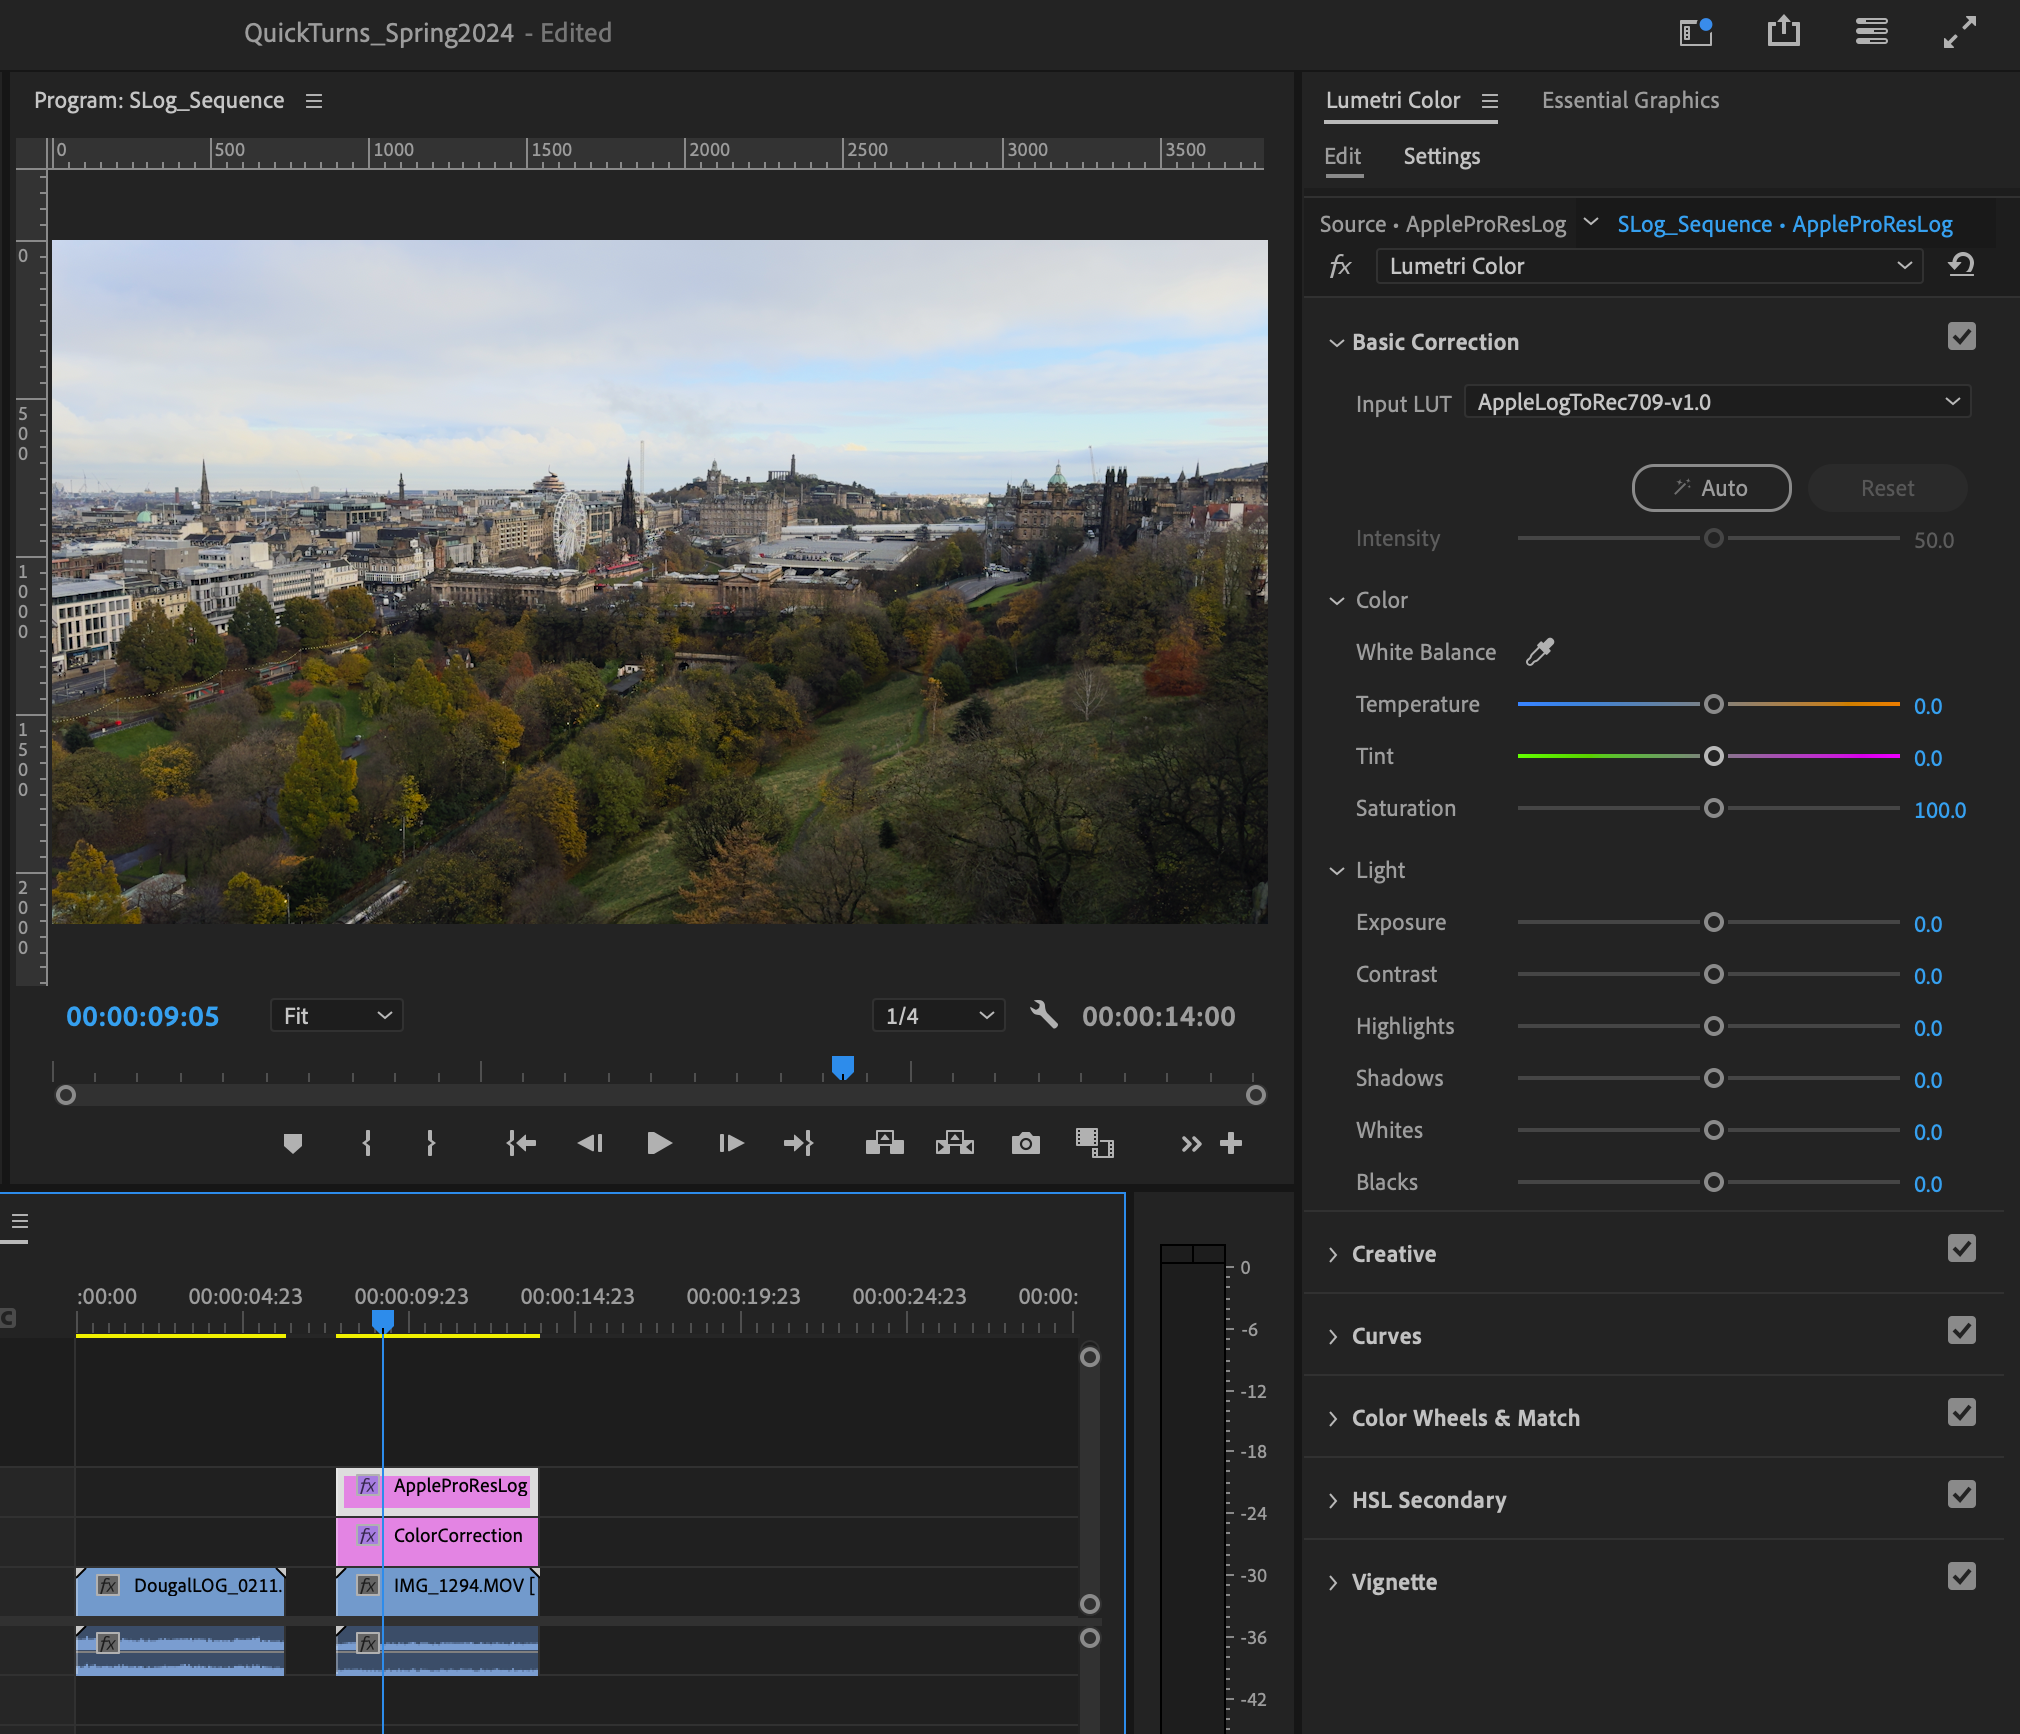
Now, once you’ve imported and applied the corrective Rec. 709 LUT to your footage, you are ready to color-correct. As a general rule, color is correction comes before color grading. Color correction involves adjusting the exposure and the white balance to display accurate colors. As vlogger Lila says here, you are not making it look pretty, just accurate.
Once you have color-corrected your footage, you can either publish or color-grade your content. Using Curves, Color Wheels, and additional tools and features (especially if you are using Da Vinci Resolve), you can shift hues and colors, creating unique color palettes throughout your image. If you are interested in creating color palettes, informed by color theory, check out our blog on this very topic. Remember, mind the skin tones. That is first and foremost an area that you generally want to keep true-to-life. Unless you are making a music video about aliens
Color correcting and grading is a blog topic in and of itself. Unfortunately, we won’t be able to cover that in this go-around. Shooting in Log, whether it’s on your camera or on your phone, is a great way to get a firm grasp on the importance of exposure and dynamic range while filming. It also provides you the flexibility to color grade and stylize your video with professional quality. Lastly, this blog offers merely suggestions to get the most out of Apple ProRes Log. Whether you use the app or suggested ISO or not, using this format will give you an impressive, cinematic image right out of your pocket.