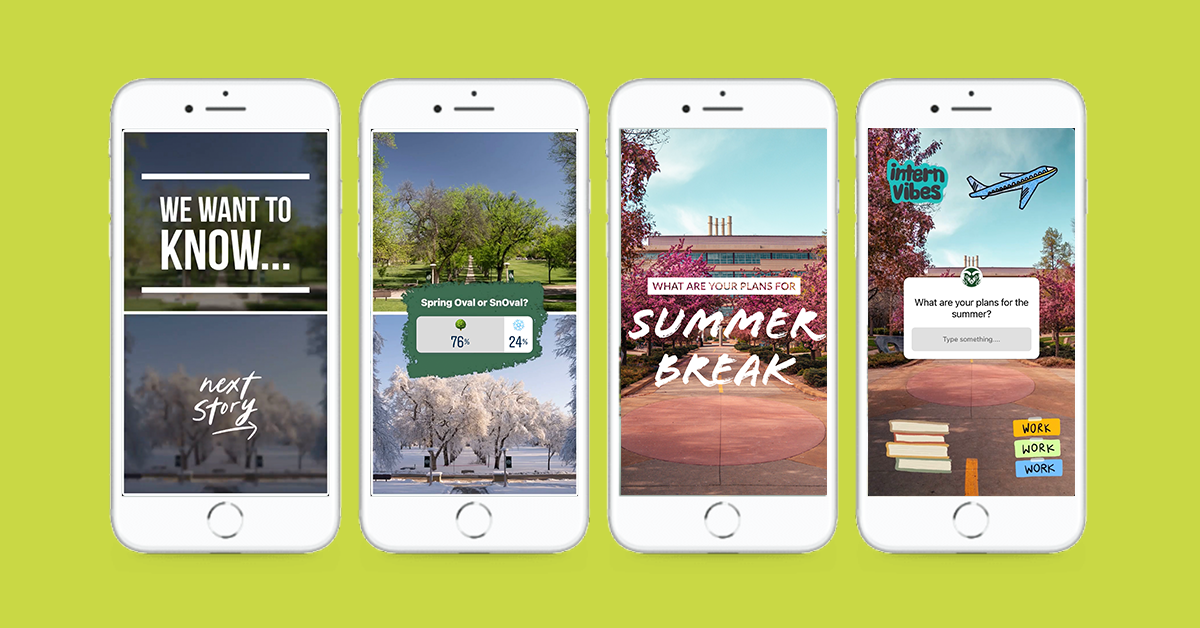
Tip 1: Save time with apps
Instagram Stories require a vertical format with an aspect ratio of 9:16 (1080 x 1920 pixels), which means social media managers are often creating specific content to fit Instagram Story’s vertical display. Luckily, there are many apps out there that can help you easily create fast and beautiful Stories.
Some popular apps include:
- Over
- Storyluxe
- Canva
- Adobe Spark
- Many, many more. See this list of 18 apps for creating Instagram Stories.
Personally, I like to use Adobe Spark to create Instagram Stories. It’s part of the Adobe Creative Suite, and comes with the cloud, making it easy to access. But, of course, you can use whatever you prefer to make Instagram Stories.
One major benefit of Spark is its capability to incorporate an organization’s visual brand language, including brand colors, logos and fonts. Whenever I use the app, I don’t have to worry about using the right brand colors or fonts because they’re already saved within the app, which ensures my Stories are always on brand.
Spark also has a tool that allows you to quickly resize any of your designs for other social media platforms, like Twitter, Pinterest, Facebook and more.
But you can’t go wrong with any app you choose. The apps will help you put text over photos, animate text, trim and crop videos and photos, create fun layouts, add stickers and more.
Another major way social media managers save time (and keep content organized!) is through scheduling out content. While Instagram allows users to schedule feed and IGTV posts, it doesn’t allow users to schedule Instagram Stories. However, Later is a platform that allows users to schedule Stories. Though it’s not free, Later also comes with great analytics and other tools for Instagram.
Tip 2: Templates
Over the last year and a half, we realized the need for and importance of templates. Templates are particularly helpful when you need to quickly share information, like COVID-19 public health updates, with your audience.
We’ve created templates specific for communicating information relating to COVID-19, general information from leadership, public safety alerts, and blank templates using CSU’s brand colors.
I save these templates to my phone in their own album called, “Instagram Story Templates,” so I can access them easily and quickly.
From there, I can upload the template to Instagram Stories or Adobe Spark and add text, stickers, a link, etc. It saves a ton of time and stress, and helps me share the information faster than creating an Instagram Story from scratch.
Here are examples of our COVID-19, general CSU information, and CSU public safety alert templates 👇
Tip 3: Publishing checklist
Before publishing anything to CSU’s Instagram Story, I follow this checklist to ensure I don’t have misspelled words, incorrect links, or am forgetting tags or hashtags. Nothing is worse than uploading 10 graphics to an Instagram Story and realizing there’s an error in the first one, forcing you to delete the entire Story and start all over again.
Take it from someone who’s learned the hard way, and consider adding these steps to your own pre-publishing checklist.
Spelling: This is probably the most important tip. Instagram doesn’t have spellcheck. It’s up to us to ensure everything is spelled correctly and is grammatically correct. I usually read my text once, add the text to my Notes app to check for spelling, make any edits, read it again (very slowly), and then post to Instagram Stories. But when in doubt, send your Story to someone on your team to give it an extra look.
Make sure you’re logged into the right account: It’s not the worst thing to post content to your personal Instagram Story, but it’s definitely double the work. Make sure you’re logged into the right account before posting. This is especially important if you manage multiple Instagram accounts.
Leave room at the top of your designs: When designing an Instagram Story, remember to leave some extra room at the top of the graphic/photo/video. Once your Story is posted, Instagram adds the account’s avatar and handle to the top of the Story, and you don’t want your text or any important information to be covered by that.
Links: First, don’t forget your link! (But if you do forget, know it happens to the best of us. Someone will usually reply to the Story letting you know there’s no link.) Second, always double check where your Instagram Story links to before publishing. When you add a link to a Story, Instagram allows you to “Preview” the link. Do it every time, thank me later. If you don’t have the ability to link within your Instagram Story, be sure to add your link to your bio after posting the Story, if not before.
Tagging/Hashtags: Before you post your Story, don’t forget to tag and hashtag appropriately. Double-check you’re tagging the right account and using the correct (and correctly spelled) hashtag.
Sound: Most of the time, you want the sound in your Instagram Story videos to be heard. But there are times, especially during live events, you don’t want the sound on. Turn up the volume every time you upload a video to Instagram Story to ensure you want everyone else to hear what you’re hearing.
Watch your story as yourself: After I finish uploading a Story, I usually switch over to my personal Instagram account and watch the CSU Story as an outside viewer. I check all the links, tags, and hashtags to make sure they look good.
Whether you’re just beginning the Instagram Story journey, or are looking for a few new helpful tips, hopefully this information helps you develop quick and beautiful content for Instagram. Happy posting!


