Google Search Console, formerly known as Google Webmaster’s Tools, allows website administrators or owners the ability to monitor and manage their site’s presence on Google search results. Search Console can be a really effective tool in helping understand how Google perceives a website. Google Search Console is one of the most important tools in an SEO toolbox. It is easy to use, and free.
In this guide (updated October 2021), I will cover some essential Search Console features, how you can use them to optimize your website and improve performance on Google search results.
Setting Up Google Search Console
Step 1: Log in to Google Search Console with your Google account credentials. You will be directed to a page that looks like this:

The next step is verifying the ownership of your website.
Step 2: Enter your website URL (for CSU Social Blog it is http://social.colostate.edu)
Now, there are five methods by which you can verify ownership. The idea with each is that you copy a snippet of code generated by Search Console and paste it on your website using any of the methods. For four of the five, you would require the help of your website developer or ‘edit’ permissions in your Google Analytics or Google Tag Manager.
If you use Yoast plugin in a WordPress website, the easiest method, in my opinion, is HTML Tag. Here’s a quick walk-through of what you need to do with this verification method:
- Copy the HTML code generated by Search Console
- Login to WordPress
- Go to Yoast Plugin, add the code in Google Search Console box and hit ‘Save Changes’
- Go back to Search Console and hit ‘Verify’
- And that’s it! You are all set to use this tool.
Website Optimization with Google Search Console
Search Console is loaded with features but let’s talk about some that are absolutely essential:
XML Sitemap
An XML sitemap is a way of explicitly signaling to Google a list of all URLs meant to be indexed by Google. Your site’s XML sitemap generally resides at yoursite.com/xml
If you do not see anything at this location then you might need to build a new XML sitemap. There are a number of tools that you can use to create one. WordPress’ Yoast Plug-in helps you generate XML sitemaps.
Once you have your sitemap in place, you can submit the URL to Google Search Console by going to the ‘Sitemap’ report.

Coverage Report
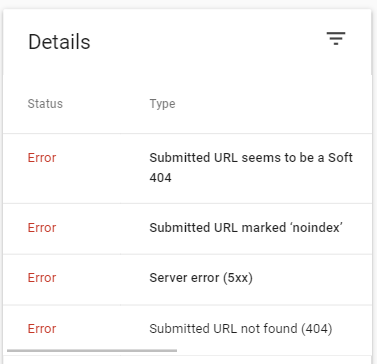
The coverage report displays how Google perceives URLs within a particular website, and helps you manage any technical errors present on your website. It shows you:
- Errors: Website errors that prevent Google from indexing webpages. These include server errors, redirect errors, page not found (404 errors), etc.
- Warnings: Pages indexed by Google, but explicitly blocked using robots.txt file by the website owner features in the ‘Warnings’ list
- Valid URLs: All your website pages that are in Google’s index
- Excluded URLs: All URLs that were not indexed by Google due to some reason

It is important to keep an eye on errors and warnings. If you see the count of errors and warnings increasing over time, you should take a deeper dive into the potential causes and connect with your website developers.
Google also suggests self-explanatory fixes for all these errors and warnings.
I will cover some quick fixes for each of these errors in a future blog.
URL Inspection tool
This tool delivers an incredible analysis of each URL on your website with respect to it’s mobile usability, crawl status and any technical errors that might prevent Googlebot from indexing the webpage. If you’ve made significant changes to a webpage, you can also request indexing by Google on priority through the URL Inspection tool.
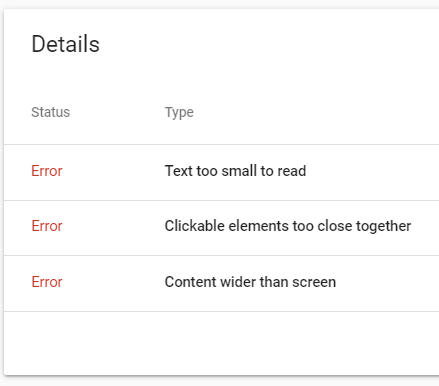
Experience panel
The Experience panel has been upgraded in 2021. It now contains the Page Experience report , the Core Web Vitals report and the Mobile Usability report. This panel provides an overview of the percentage of URLs Google deems as having a good page experience, and the mobile-friendliness of your webpages. If you drill-down into the report, you will be able to see the number and type of technical errors on webpages.
Google News performance report
Earlier this year, Google integrated a sub-section within the performance panel for Google News publishers. This report can be help publishers and news websites to understand their performance on Google News from the sub-domain news.google.com, and from Google News app on both iOS and Android.
Improving Keyword Rankings with Google Search Console
The top three or four search results on Google account for approximately 80 percent of clicks for most search queries. A website ranking in the bottom half of Google’s search results page hardly receives any clicks.
Take a look at the performance of Clicks vs. Impressions for positions 1, 2 and 3 for CSU’s News Website:
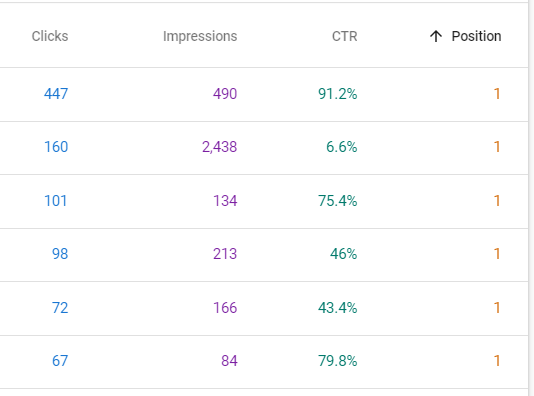
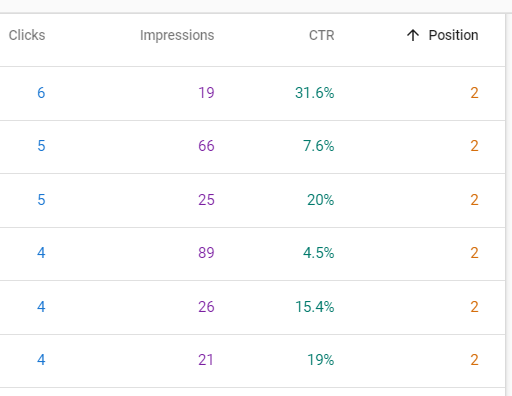
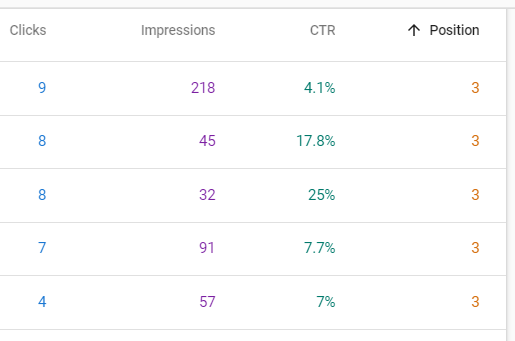
Notice the big drops in click-through rate (CTR) as you move down in positions on Google search.
The pay-off in moving from a position number four to position number three can be big if you identify the right keywords in your Search Console dashboard. In the following section, I attempt to walk you through a strategy to boost keyword positions and increase click-through rates on queries that you are already ranking for on the first page.
Step 1: Observe current performance on search results
To view the search queries that you currently rank for, click the Performance tab, that’s on the left menu on your Search Console dashboard.
Select Total clicks, Total impressions, Average CTR, and Average position in the Performance panel.

Step 2: Identify underperforming keywords in Google Search Console
You should be looking to bump up the position for keywords (search queries) that:
– Are on the first page (positions 1 through 10) of Google search results
– Have high impressions and
– Have a low click-through
As an example, you could apply filters to select ‘Position’ less than four, and ‘CTR’ less than three. Go on to sort the Impressions column in descending order.
A search query having high impressions indicates that the search volume for that query is high and your webpage is showing up in results for that query. A low click-through on the first page of Google results indicates that either the page mapped to the query has content irrelevant to the search query or the keywords in the query have low visibility on your webpage.
Try to find queries that have a low CTR and also are most relevant to the content that you create. Once you lock-in on a search query, from the panel, select the corresponding page where this query is mapped. Personally, I like to export the data as a spreadsheet and select a bunch of queries at the same time.
The final step is to build content around the themes of your selected queries and add the selected search queries as keyword instances within the content, page titles, headings, and meta information.
This is by no means everything you need to do to boost your keyword rankings, but it is an efficient step, one that requires minimal resources and can potentially deliver great results.